
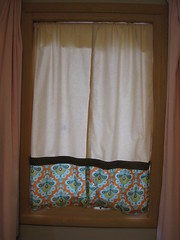
I have a really hard time matching patterns up and keeping things even when I have to make two of something. Fortunately my office windows are small enough so I can use one piece of 45" wide fabric for two panels. I sewed the main and contrasting fabrics together and then cut the large panel in half lengthwise so it would match up perfectly when I hung them on the windows.
You could hang these panels from a tension rod like I did, a regular curtain rod or something more decorative with the little clip rings.
Supplies needed:2 1/2 yards of the main fabric (I used Moda Bella Solids in Natural)
1 yard of contrasting color A (I used Amy Butler Belle in orange/french wallpaper)
1/2 yard of contrasting color B (I used Sevenberry in brown with white polka dots)
3 yards of lining fabric (I used unbleached muslin)
buttons for the tie backs
thread
fabric pencil
curtain rods
 cut fabric:
Main fabric - cut in half width-wise so you have one piece for each window.
Contrasting fabric A - cut 2 strips 14.5" x 45" (or the width of the fabric)
Contrasting fabric B - cut 2 strips 4" x 45" (or the width of the fabric)
Lining fabric - cut in half width-wise so you have one piece for each window. Then cut in half length wise to make 2 panels for each window.
Main fabric - cut 4 strips 4" x 40" (for the tie backs)
Assemble:
 Step 1:
 Place main fabric and fabric A right sides together and sew. I used a 5/8" seam allowance.
 Step 2:
 Press the seam open. I always press the seam down to the darker/patterned fabric if possible so it doesn't show through the lighter fabric.
 Step 3:
 With fabric B, measure and draw a line down the center of the wrong side of the strips. You can see my line in very light purple.
 Step 4:
 Press one side so the edge touches the center line.
 Step 5:
 Fold and press the other side to meet the center line. You will now have a strip that is 2" wide.
 Step 6:
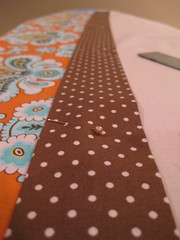
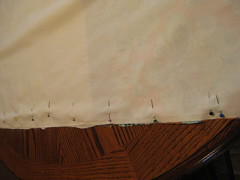
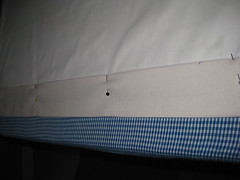
 Pin the strip over the seam between the main fabric and fabric A. I measured 13" up from the bottom edge of the fabric.
 Step 7:
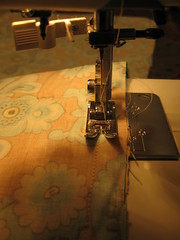
 Sew both edges of fabric B to the main panel. I lined up the edge of the fabric with the edge of my presser foot.
 Step 8:
 With wrong side facing you, turn the bottom hem up an inch and press. Now fold the raw edge under so it is hidden in the fold. Press and pin.
 Step 9:
 Sew.
Repeat steps 8 and 9 for the lining.
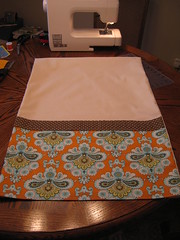
 Step 10:
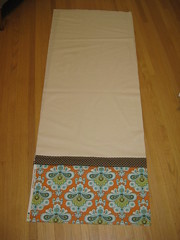
 Cut the fabric in half length-wise. You will now have two matching panels.
 Step 11:
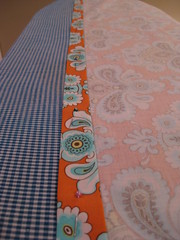
 Pin the lining and curtain right sides together. Trim the lining if necessary.
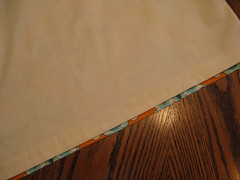
Line it up so a small bit of the curtain peeks out from behind the lining - mine is about 1/4".
Step 12: Sew the long edges of the curtain. I used 5/8 seam allowance.
 Step 13:
 Turn the whole thing right side out. It should look like a sleeping bag with the top and bottom open.
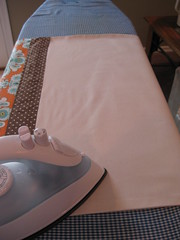 Step 14:
 Press seams open.
 Step 15:
 Determine the final length for your panels. Measure the panels and fold the top over where the rod will go. Press. I always like to hang the panels at this point to make sure everything is in line. Securely pin the flap you just folded over, making sure there is enough room for the curtain rod to slide through. Insert the curtain rod and hang. Check to make sure you like the length and the bands of fabric are lining up and make any adjustments.

Step 16: Measure how much of an opening you need for your curtain rod to slide through. Mark this plus a little extra for wiggle room with a fabric pen. Cut the excess fabric off so you have about an inch of extra material past the line you drew.
Step 17: Fold the raw edges in, press and pin. Sew.
The panels are finished! No go hang them and admire your hard work.
To make tie backs:
Follow steps 3 - 5 and fold over one more time so the raw edges are sandwiched in the middle. Your strip should be 1" wide.
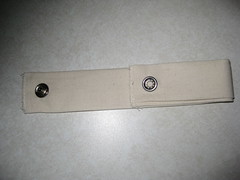
Attach snaps - I used the one snaps with little prongs that you hammer together but you could use sew-in snaps, velcro, buttons or whatever you like.
Sew ends and sides.

Attach button if you are using one.


My bookshelf used to be in that corner so it's feeling pretty bare right now. I need to hang something - maybe a sleek mid century clock.


